The appearance of your site is determined by its CSS Theme. CSS stands for Cascading Style Sheets, and it essentially defines rules and properties of various elements on a page. You as a site administrator have the option to change the site's theme or modify it to fit your purposes.
|
Table of Contents
|
Selecting a Color
The default theme of the Standard Template is called, rather creatively, the Standard Theme. Utilizing a combination of sharp corners and round edges, the theme is fierce, yet elegant. Given its generic nature, it could be used with basically any site.
You may, however, find that the default color does not fit your personality. Thankfully, the Standard Theme comes in eight different colorful flavors: Red, Orange, Yellow, Green, Blue, Purple, Black, and White. Best of all, we've made it pretty simple for you to select the color you desire.
To change the color of your site, simply follow the below steps:
- Go to the Site Manager.
- From the Dashboard, click on "Appearance & Behavior".
- Look for the first option, called "Themes".
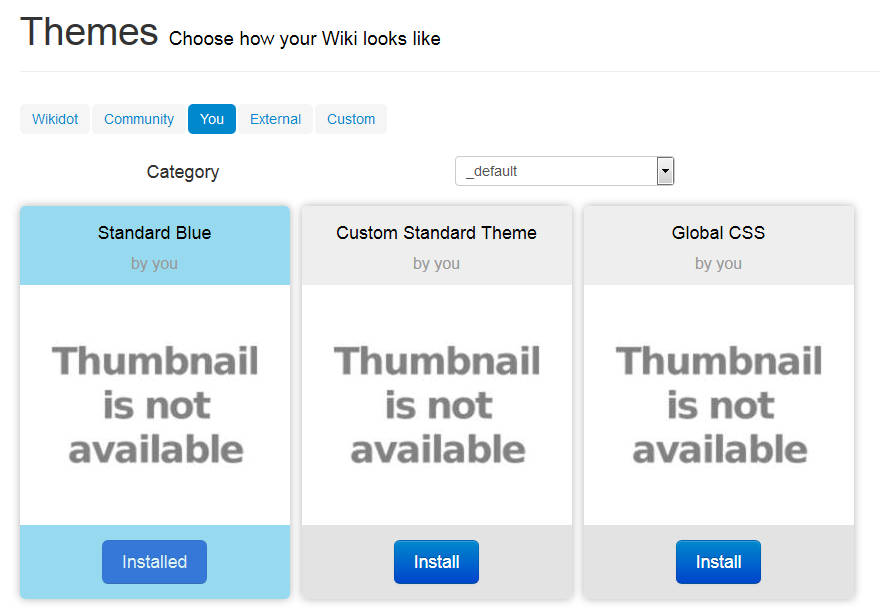
- After it completely loads, click on the tab titled "You".
- Find the color you wish to use and click "Install".
- After that, you're done!
Custom Colors
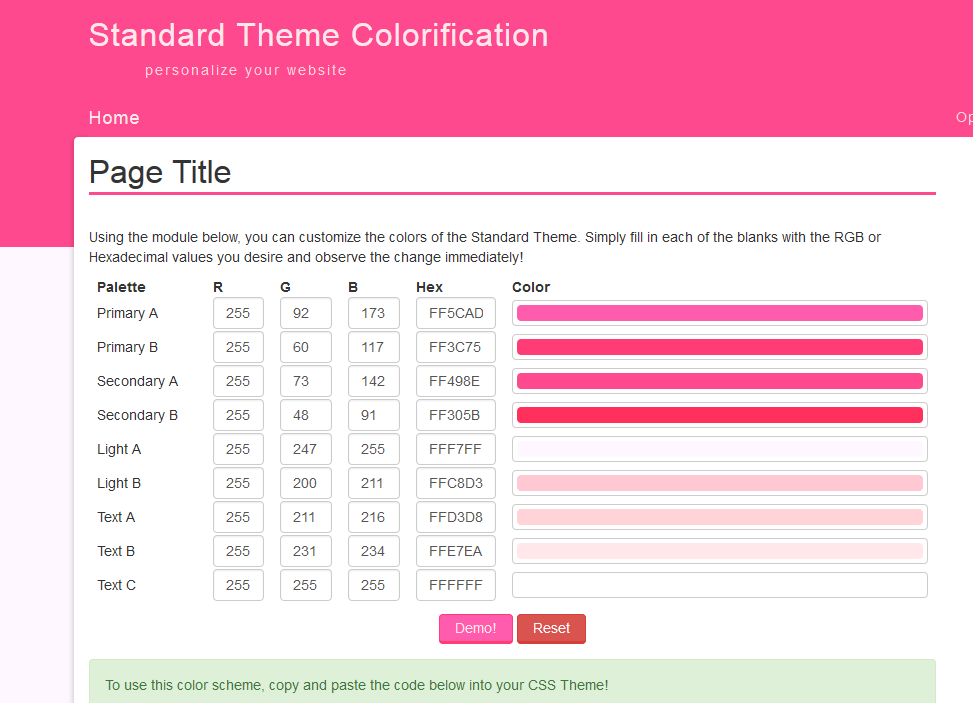
What if you don't like any of those eight colors? Luckily, you can define your own color scheme using the Standard Theme Colorification tool! This tool allows you to define specific colors, and afterwards will give you the code that makes your new scheme. In order to apply it, follow the below steps:
- Go to the Site Manager.
- From the Dashboard, click on "Appearance & Behavior".
- Look for the first option, called "Themes".
- After it completely loads, click on the tab titled "Custom".
- Find the Theme named "My Colors".
- Paste the code given to you by the tool into the text box that appears on the bottom
- Note: Do not change the theme's name!
- Click "Save Theme".
- Go to the top and click the tab titled "You".
- Find the option called "Custom Standard Theme" and click "Install".
- After that, you're done!
Editing Your Theme
Sometimes, you may wish to tweak your theme here and there. For instance, what if you wanted all links to be underlined? The Standard Template is set up to make this process very simple and painless. For this to be useful, though, you need to have an understanding of what CSS is and how it works. To learn more, W3Schools has some good tutorials.
This process is slightly different for private sites. If you have a private site, please read the Private Sites section.
Themes work using a partnership between the Site Manager and what are called CSS pages. If all you want to do is modify your current theme, you only need to edit one special CSS page called Global CSS. This page is exactly like a wiki page, except only admins (by default) are allowed to modify it.
To access your CSS pages, go to the Themes Administration page. This page will list all the CSS Pages that you have created or are available. One of them should be titled Global CSS. If you click on it, it will take you to the Global CSS stylesheet. You can then edit the page and edit your CSS there.
A Theme from Scratch
It may be that the Standard Theme does not fit the need of your site. Perfectly understandable! We in fact encourage that you customize your site in whatever way you wish! After all, Wikidot excels at site customization.
Therefore, you may wish to create an entirely new theme. To do this, we encourage the use of the Themes Administration page, as this will allow you to keep a history of your site's CSS changes.
The first thing you should do is create a new stylesheet page using the form provided on the Themes Administration page. This will create a new page with a little bit of code on it. Place your CSS between the provided [[code]] tags. This page will now appear on the Themes Administration page, and you may edit it at any time. By default, only admins are allowed to edit CSS pages.
Once you have a CSS page, you must now apply it to the site using the Site Manager. To do this, follow the below steps:
- Go to the Site Manager.
- From the Dashboard, click on "Appearance & Behavior".
- Look for the first option, called "Themes".
- After it completely loads, click on the tab titled "Custom".
- Find where it says "Create a New Theme", and click it.
- You should see a variety of options.
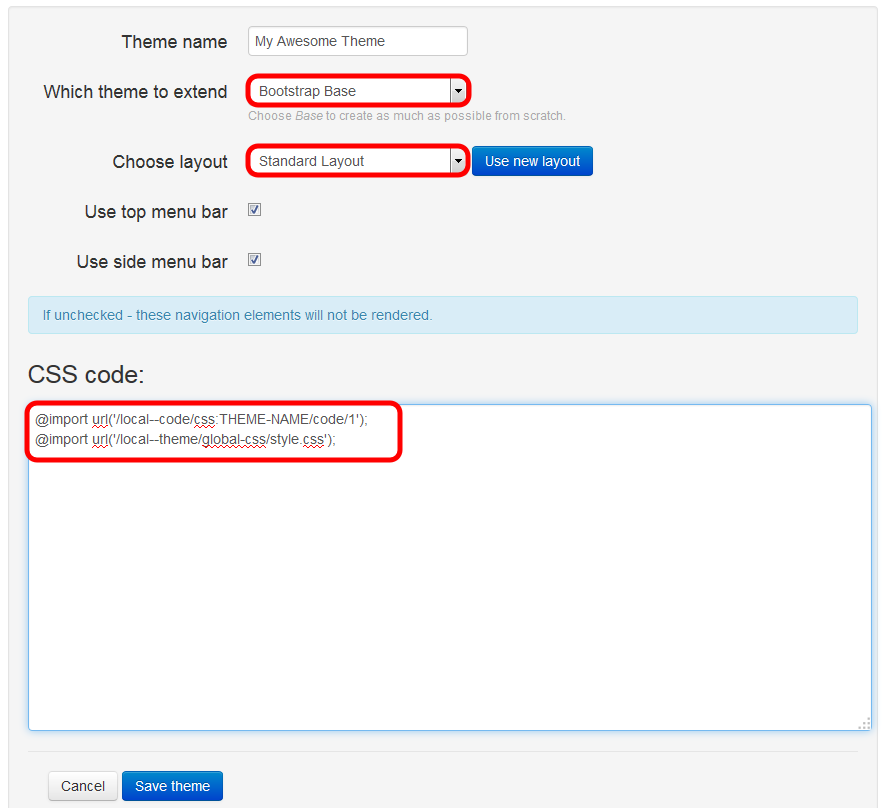
- On "Which theme to extend", change it to "Bootstrap Base".
- On "Choose layout", change it to "Standard Layout".
- In the large text field, paste the following code:
@import url('/css:THEME-NAME/code/1');
@import url('/local--theme/global-css/style.css');
Note that THEME-NAME is the name you gave the theme on the Themes Administration page, all lower case and spaces replaced with hypens.
Once you press "Save Theme", this will create a theme in the site manager. Now you only need to apply it.
- At the very top, click on the tab titled "You".
- Find your theme and click "Install".
- After that, you're done!
If you are making your theme from scratch, it might be useful to know the page's HTML structure. This structure follows the Standard Layout, provided on that page for your edification. Note also that this layout is based on Bootstrap, and hence you have access to Bootstrap utilities and classes.
Private Sites
If you are making a Private site, then the CSS pages on the Themes Administration page will not function. Instead, you should manage all of your CSS via the Site Manager. To tweak your site's CSS or make a new theme, follow the below steps:
- Go to the Site Manager.
- From the Dashboard, click on "Appearance & Behavior".
- Look for the first option, called "Themes".
- After it completely loads, click on the tab titled "Custom".
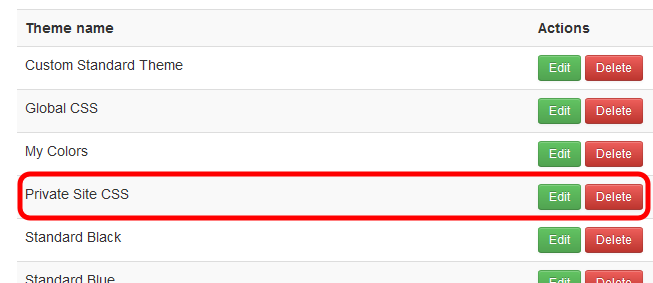
- Find the Theme called Private Site CSS
- Insert whatever CSS you wish in the text box at the bottom
- Click "Save Theme"
- Whenever you need to apply more tweaks, perform these steps again.


